Usage Guide - Geographic Information System - MapViewer
Content
Introduction
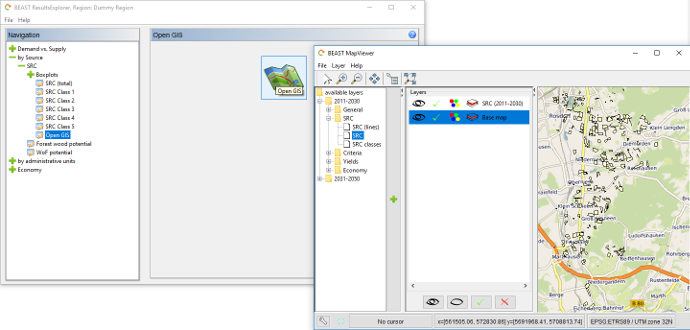
To offer the exploration of spatial results on individual field level, a simple geographic information system is integrated into the ResultsExplorer. To open the MapViewer just push the button with the map icon in the section by Source > SRC > Open GIS. The MapViewer uses WebMappingServices (WMS) to visualize background maps (such as Open Street Map). This is only possible, if the software has a connection to the internet. Otherwise, you can explore the different input and result layers but without a background map.
In the MapViewer window you will find a menu and toolbar at top, a layer selection tree on the left, a large "add" button next to the layer selection tree, a layer list, and the map on the right. The status bar on bottom delivers additional information about the map, like coordinates of the mouse arrow and the coordinate reference. To add a layer from the layer selection tree to the map, select the corresponding layer and press the large "add" button next to the layer selection tree.
Menu
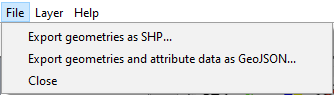
With the File menu you can export the geometries of the fields to a shapefile (SHP). Furthermore, you are able to export the geometries with attribute data as GeoJSON. The last menu item closes the MapViewer.
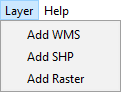
The Layer menu contains items to add further layers to the map from different sources. With the first menu item you can add a layer from a valid WebMappingService (WMS) - a connection to the internet is required. External shape- and raster files can be added to the map with the second and third menu item.
Toolbar
![]()
With the toolbar at top of the frame you can change the functionality of the mouse arrow in the map. The functions of the tools are as follows:
- Plain cursor.
- Zoom in.
- Zoom out.
- Drag.
- Identify feature tool.
- Full extent.
Identify feature
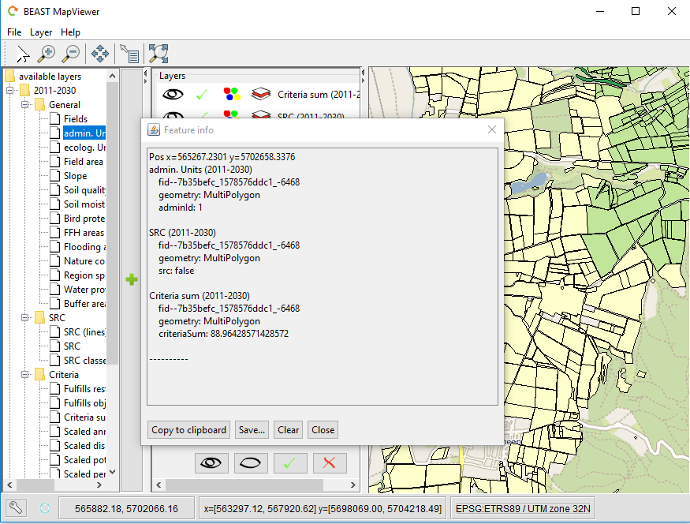
When you activate the identify feature tool from the toolbar and click on a polygon/feature a window with feature information for this polygon/feature is presented. The information listed depend on the active map layers. The shown data can be copied and saved using the buttons at bottom of the pop-up window.
Layer toolbar
![]()
This symbols are in each line of the layer list. Their functions are:
- Show/Hide a layer on the map.
- Select/Deselect the layer.
- Change the colour scheme of the layer.
- Remove the layer from the map.